By Dave Fuller
QNX and VMWare, it may make you laugh, however, it also may make you more productive .
I spent a lot of time in Windows because that's how I feed my family. I dabble in QNX to resolve issues for people whose time is more important than mine. That's not a bad thing because these people are working on really important stuff. Unfortunately, due to the "Windows issue", I find myself often short of a machine to do my QNX troubleshooting.
Some people from the QNX IRC channels might remember last year when I spent an inordinate amount of time getting QNX to work in VirtualPC. VirtualPC, while a capable product, didn't provide the necessary performance to make using QNX with it a realistic proposition. And, VMWare 3 would not run QNX at all.
In this article, I'm going to tell you how to run QNX with VMWare 4. Some of it may appear to be a hack, and they would be right. Before we get to the "how's" of running QNX in VMWare, lets get to the "why's".
The first reason may be that you don't have an available computer to install QNX on, or that you do not want to go through the pain of setting up a multi-boot system. Another reason may be that you are new to QNX and are not sure about commiting to using it every day.
But let me give you another, more important reason why running QNX in VMWare can be useful: It can help you with your Quality Assurance activities. This assumes that your development target is X86 based.
Running VMQNX (I just made this up), while it won'tt let you QA time sensitive functions of your solutions, however, it will help you to test many instances of your application running on a network or provide an easy place to use the Windows Tools with an actual QNX installation. Plus, I hesitate to mention it because we all know that this never happens with QNX, if you crash your VMQNX session, its pretty easy to reboot
There are many more useful opportunities for VMQNX that I'm sure have not even beeen thought of at this point. I look forward to hearing what other ideas people come up with for leveraging VMQNX in their organizations. Ideas are great, they are the only way we ever get anything done!
On to installing QNX in VMWare.
The first thing you have to do is create a new Virtual Machine in VMWare 4.0 by clicking on the "New Virtual Machine Icon".
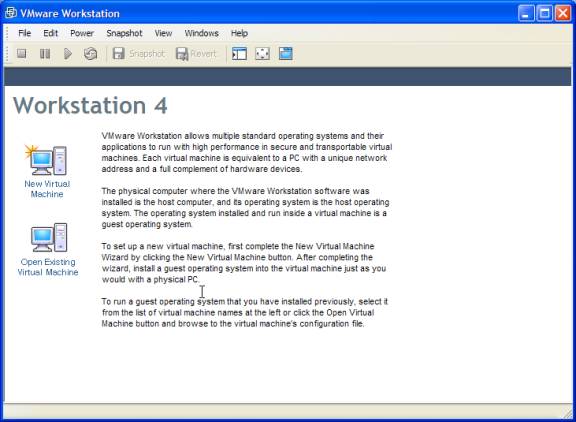
This will in turn start the "New Virtual Machine Wizard".
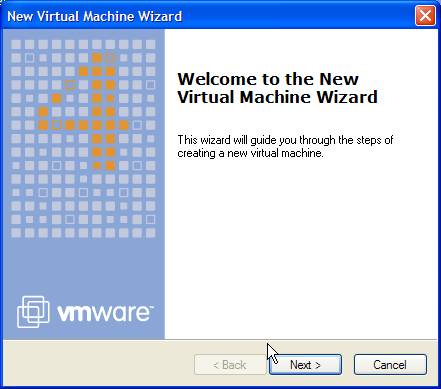
Advance to the next screen by clicking the "Next" button.
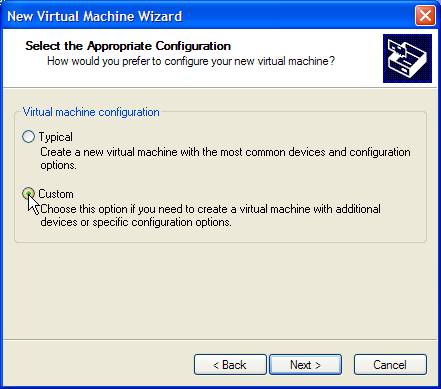
On this screen you will choose custom because we are going to want to do a few things that are out of the ordinary.
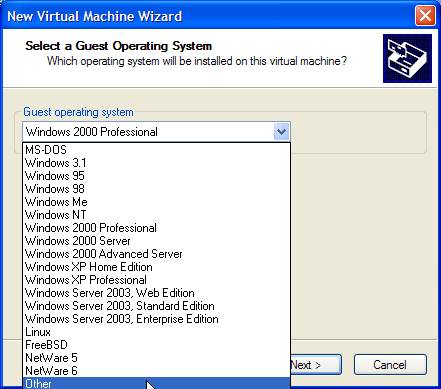
QNX is not a supported guest OS for VMWare, so we choose the "Other" selection when selecting the guest operating system.
And this page of the wizard should be fairly self explanatory.

Select how much of your physical system memory you wish to allocate to QNX. VMWare provides you with some hints on this page to help you choose something that will work for you.
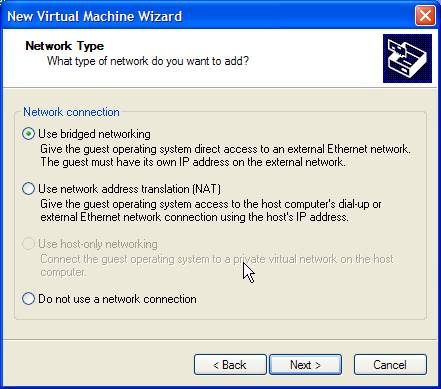
Select the networking you would like those use. As you can see, VMWare provides you with descriptions on what each of the options provides. Do not worry, VMWare emulates an AMD NIC and it does work under QNX. If you used bridged networking, you will even get dhcp addresses assigned from whatever DHCP server your network has.
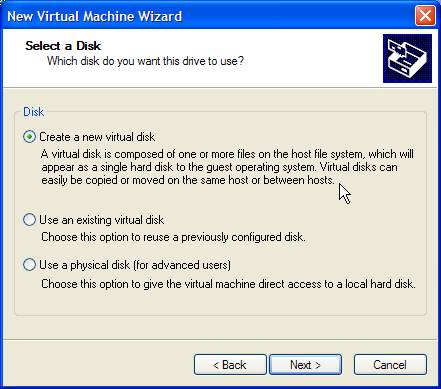
Now we start getting to the interesting stuff. On this page, and subsequent pages you will configure what fixed disks your system will have. A disk to VMWare is simply a file stored in somewhere on your Windows or Linux filesystem.
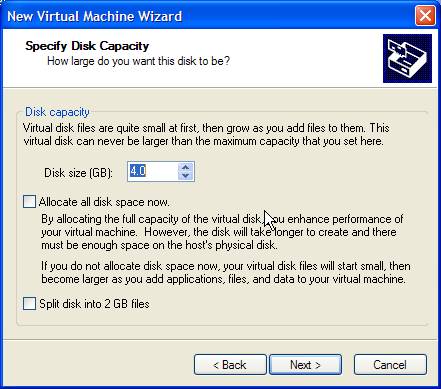
Only a few more screens to go and we'll be able to get to installing QNX in VMWare. On this screen you set the constraints on the file that VMWare uses to emulate a hard drive to QNX. It is important to note that the Disk Size parameter cannot ever grow larger than the initial size specified on this screen. As you can see from the helpful hints, there are ways to increase the performance of your VMQNX by preallocating the space used by the virtual fixed disk.
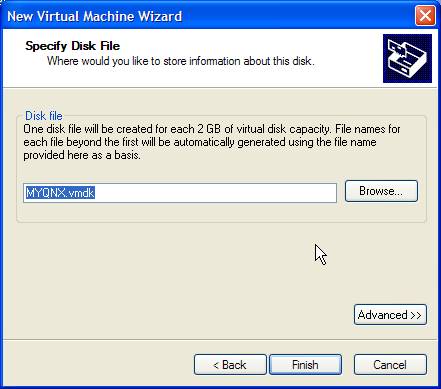
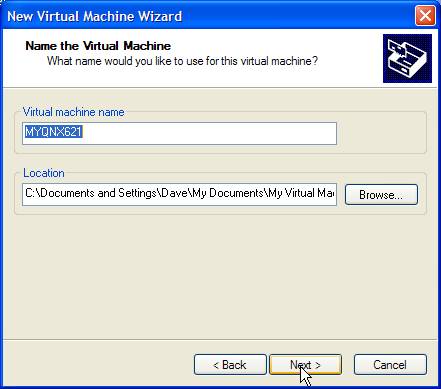
And finally, you specify the filename used to store your virtual fixed disk.
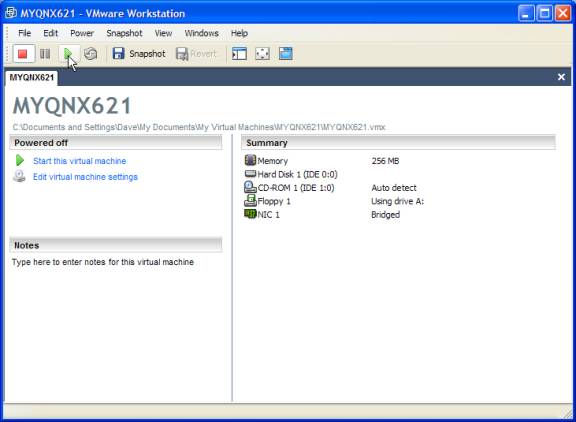
Now we have provided the basic information that VMWare needs to configure a virtual machine for QNX. By default VMWare assigns several devices to your configuration which can be seen by choosing "Edit|Virtual Machine settings".
In this page, you can add additional hardware to your VMQNX installation and control various settings pertaining to that hardware. I leave it up to the reader to explore the various options here.
Now, we are actually to the point where we can begin to install QNX. To do this, simply put your QNX CD into your CD-ROM drive. By default, VMWare will expose your physical drive to its Virtual Machine, so any CD you put in will be able to be read by QNX as long as its contents are supported. Once you've put the QNX CD into the drive, press the "Power On" button located in the VMWare window.
Now the QNX installation will start. Here we are going to do a couple of things that are out of the ordinary for a QNX installation so its important to pay attention to the next couple of paragraphs and screen shots.
First, when booting make sure that you click in the VMWare window to let it know that it has the focus and should capture mouse and keystrokes. At this point, you will go through the basic QNX installation process that consists of accepting the license agreement and configuring the fixed disk. At the end of this process you will be asked to reboot and here is where the "hack" mentioned at the beginning of this article comes in.

When we reboot, we are going to boot into a safe mode so we have to hit space bar to input boot options. Once the menu is displayed we are going to select "F1" to get to the safe modes menu and select F3 "F2 plus do not start photon". VMWare has a problem with Photon initially that we are going to hack around. I look forward to when this hack is no longer necessary, however, for the time being it works.
After selecting F3, press enter twice to continue the boot process. You might see a few error messages which you can safely ignore. At the end of the boot process you will have a login prompt. Go ahead and log in and change to the "/lib/dll" directory. Here we are simply going to rename the "devg-vesabios.so" library to "devg-vesabios.so.bak". VMWare has a problem when the vesa library is loaded and basically performs its equivalent of a "Panic" and shuts down.
Once you've renamed this file, you can reboot and install QNX as normal whether it be QNX NC, QNX SE, or QNX PE. The only thing that you'll notice is that when you initially start the installation, you can only select VGA 640x480. After you log in, you can configure the graphics to any SVGA resolution.
Now, as an aside, one thing that I've found really useful about using VMWare is the ability to take a PCMCIA compact flash adapter and tell QNX that its an actual IDE drive by adding another drive and selecting the "RAW" mode. This is decidedly useful for me since I normally work on a Toshiba laptop that doesn't seem to like a real QNX installation.
I hope that this article is helpful and if you have any questions, I can be reached at my e-mail address.